How to integrate an AI service in an application
In this tutorial we show how you can integrate an AI service in an application, after you bought a subscription.
You can test AI services from the App even before you start any integration of the service in your application.
How to integrate a web service
The steps to integrate are the following:
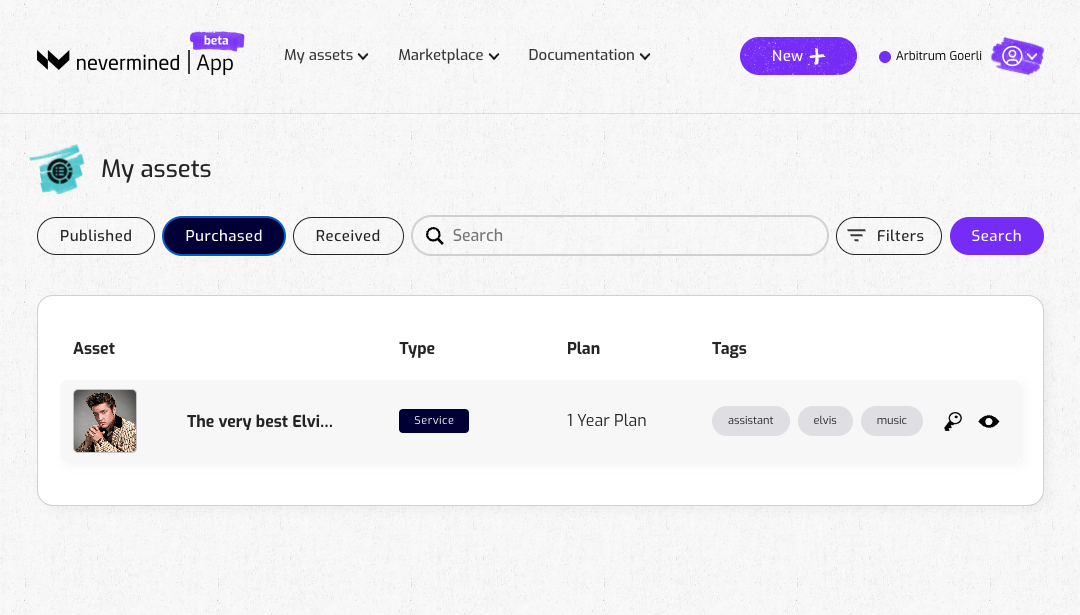
1. Open your Dashboard page
Click on the "My Assets" link on the header of the application. Select the "My Assets" option in the menu, and click on the "Purchased" tab.
You will see a list of all the assets you can access. Use the filters in the Search Bar to see only the Services.
2. Get information about the Service
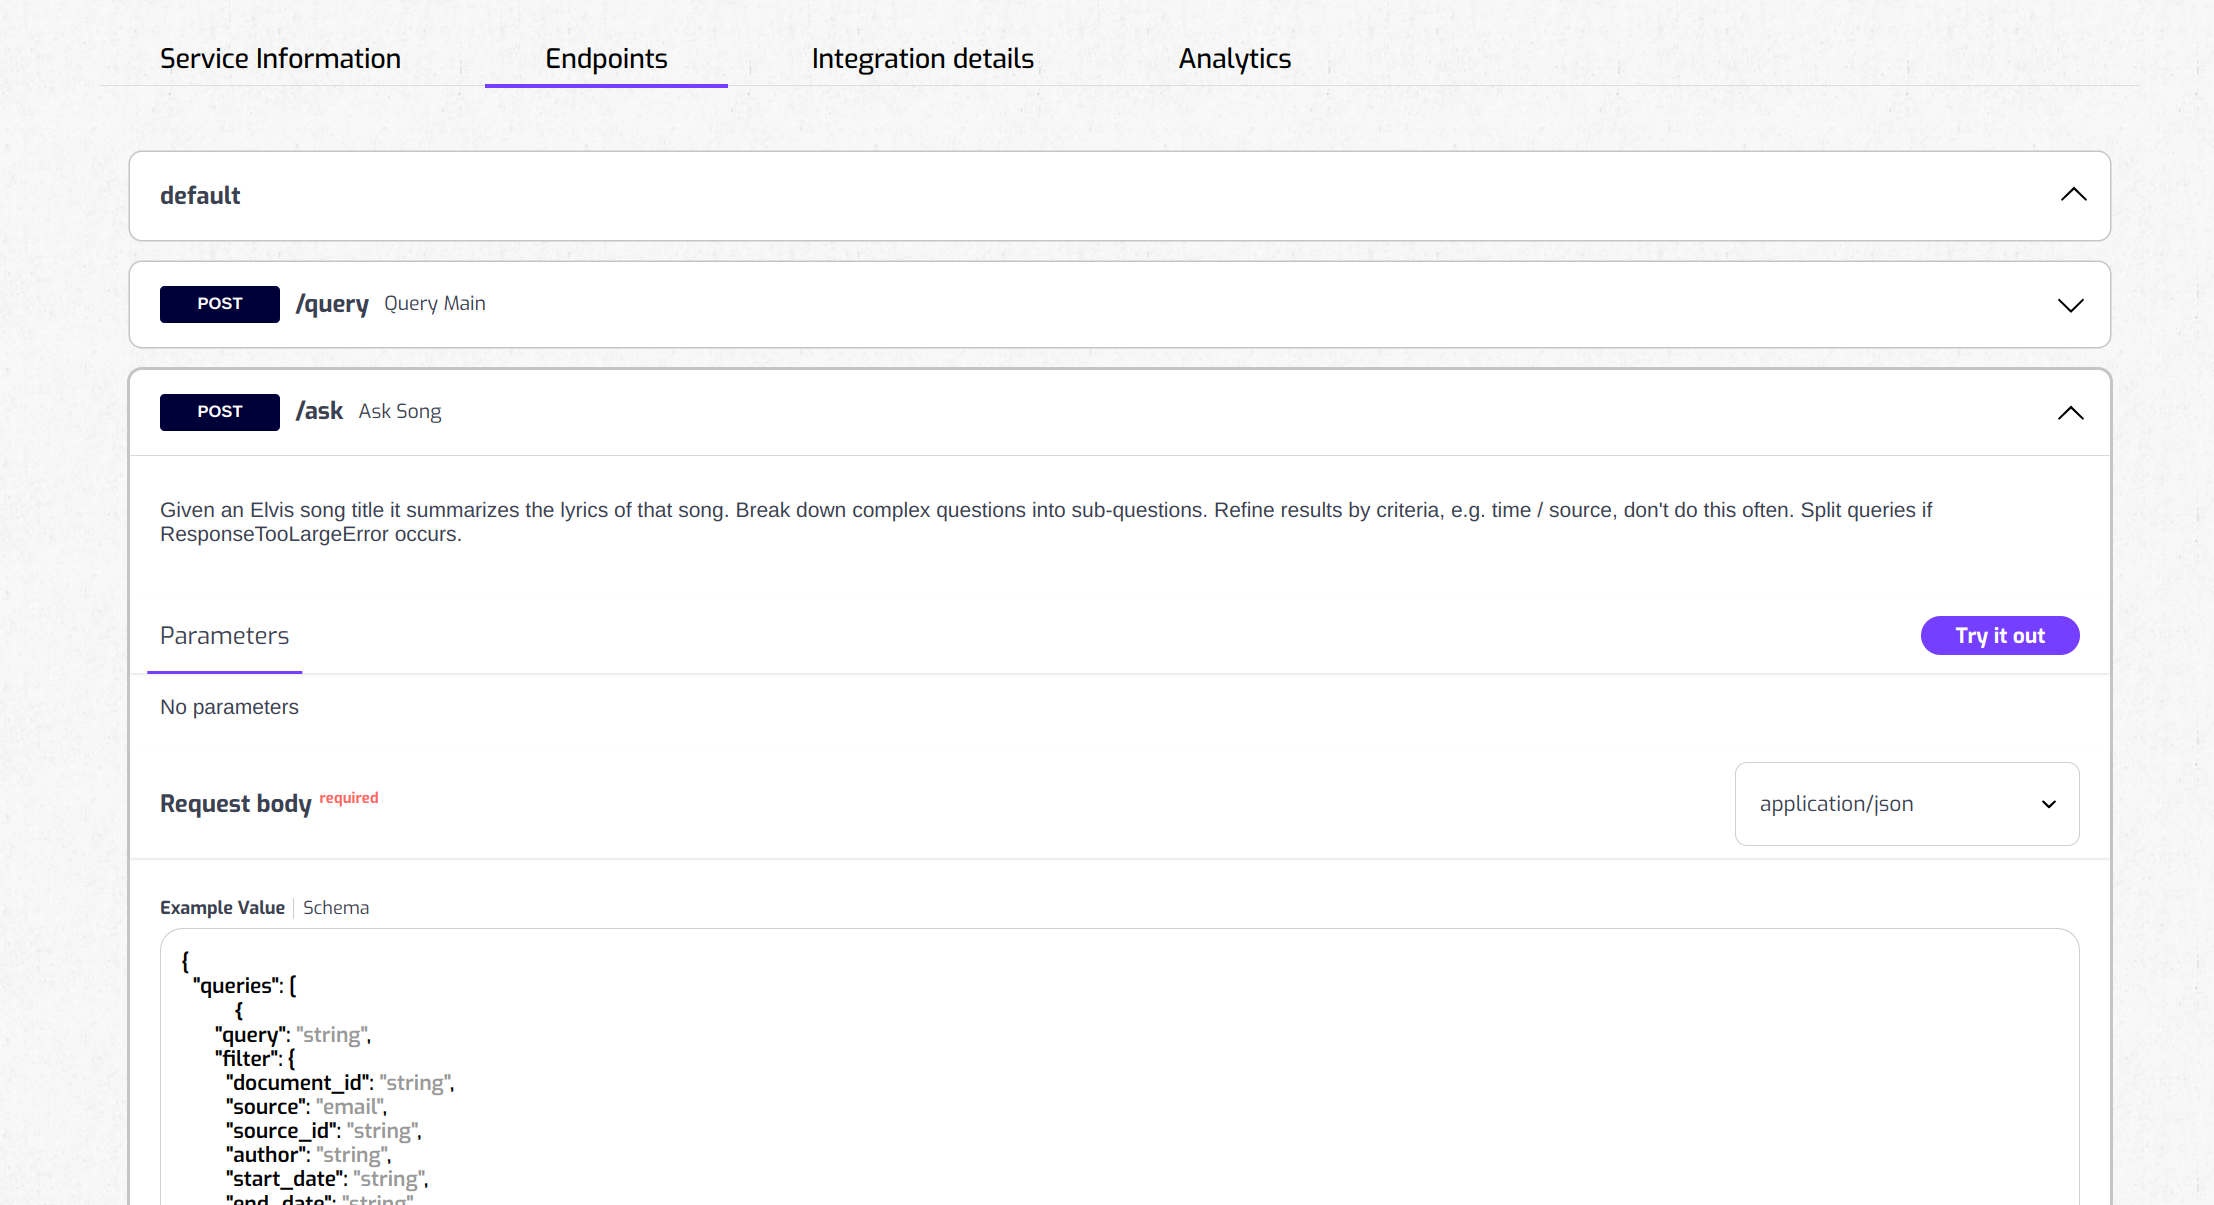
You can access to detailed information about the service clicking the icons on the right hand side.
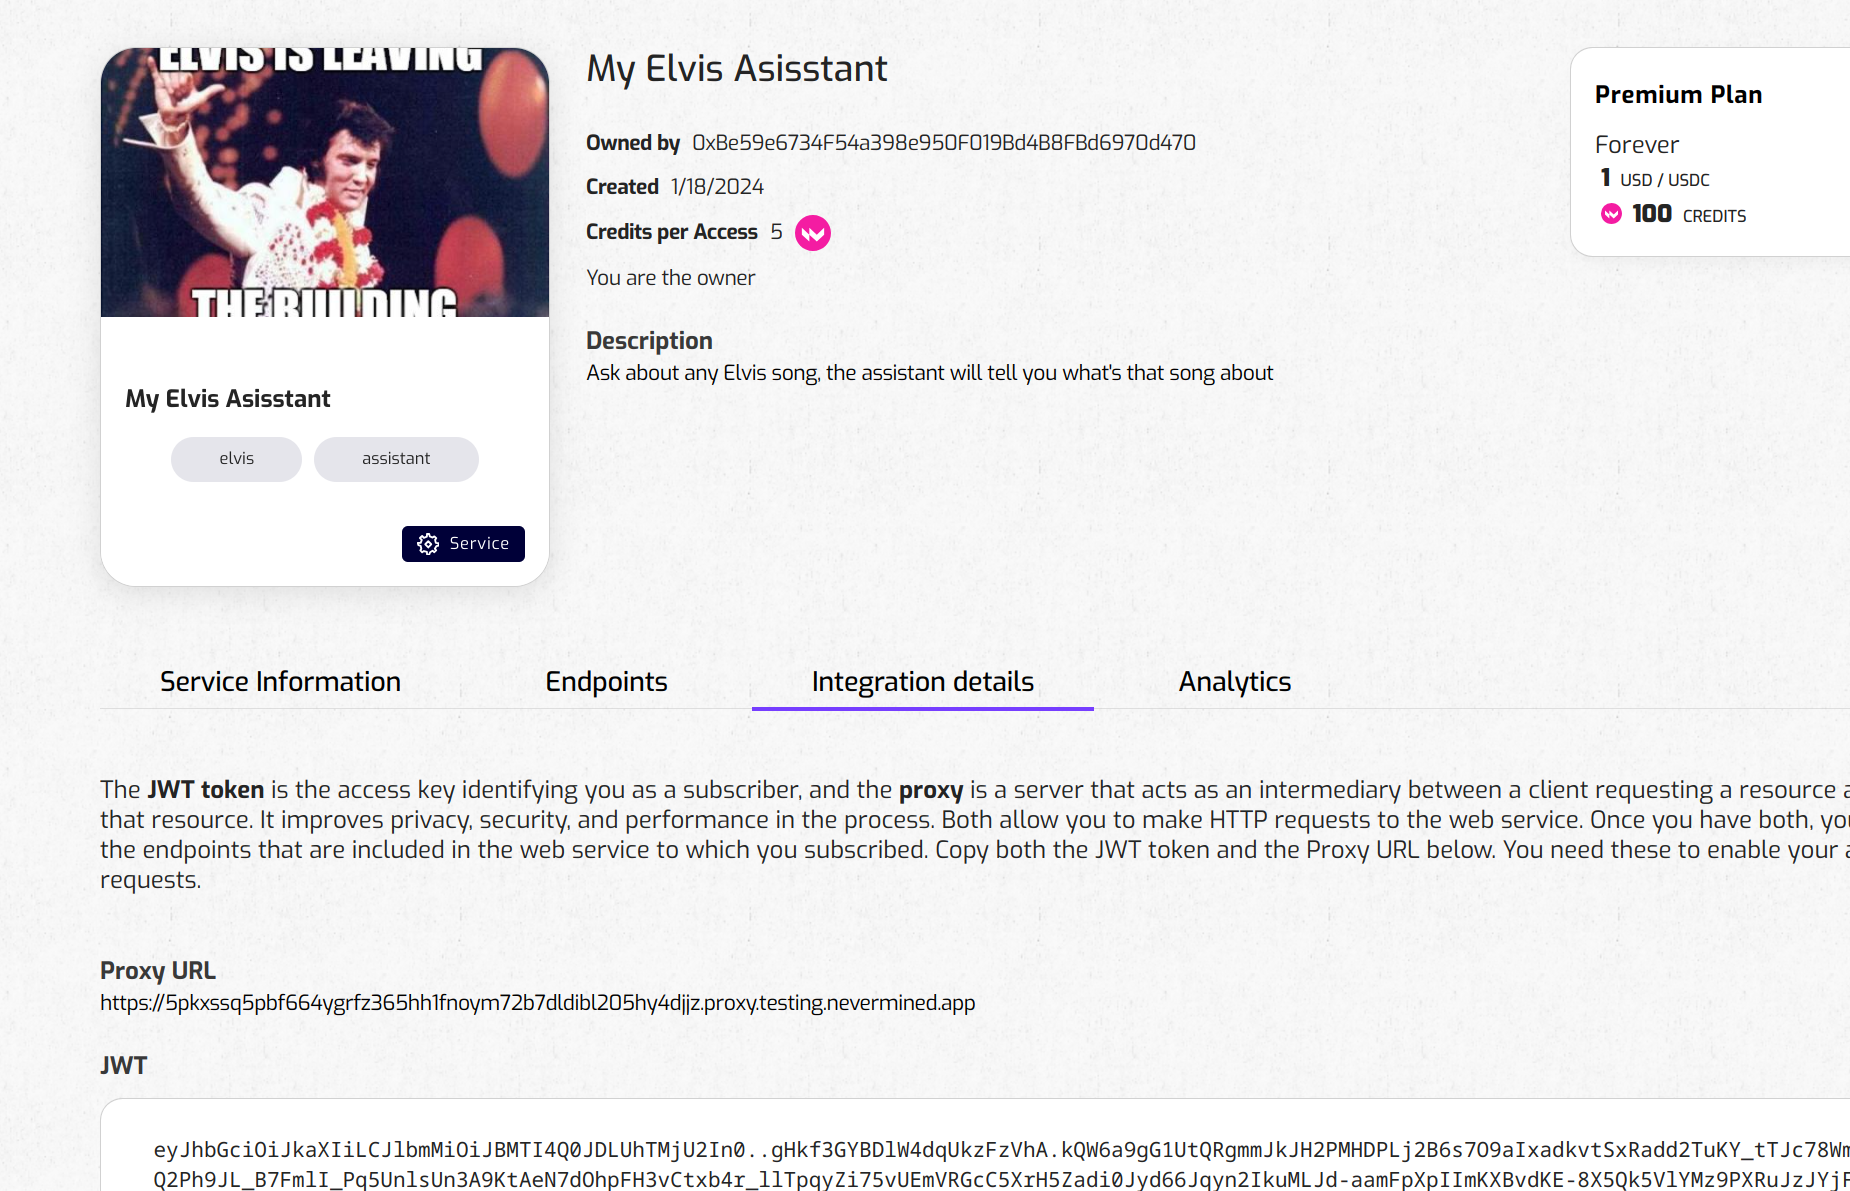
The fist tab, "Service Information", shows some information about the service, like the description and the information provided by the publisher about how to integrate it.
In the tab "Endpoints" you'll see detailed information about the endpoints this service exposes, where you can find information about the parameters and the responses.
This Endpoints tab is only showed if the publisher provided an OpenAPI definition.
In the tab "Integration Details" you'll find the details about how to make HTTP requests to the AI service. ou will find see the web service's JWT access token, along with the Proxy URL and an example of how to call the service:
3. Testing the service from the App
If you are the publisher of the service OR a subscriber, you can test the service directly from the App. Go to the "Endpoints" tab and select the endpoint of the list you want to test. Then click on the "Try out" button. Provide the parameters, body, etc. required by the service and click on the "Execute" button.
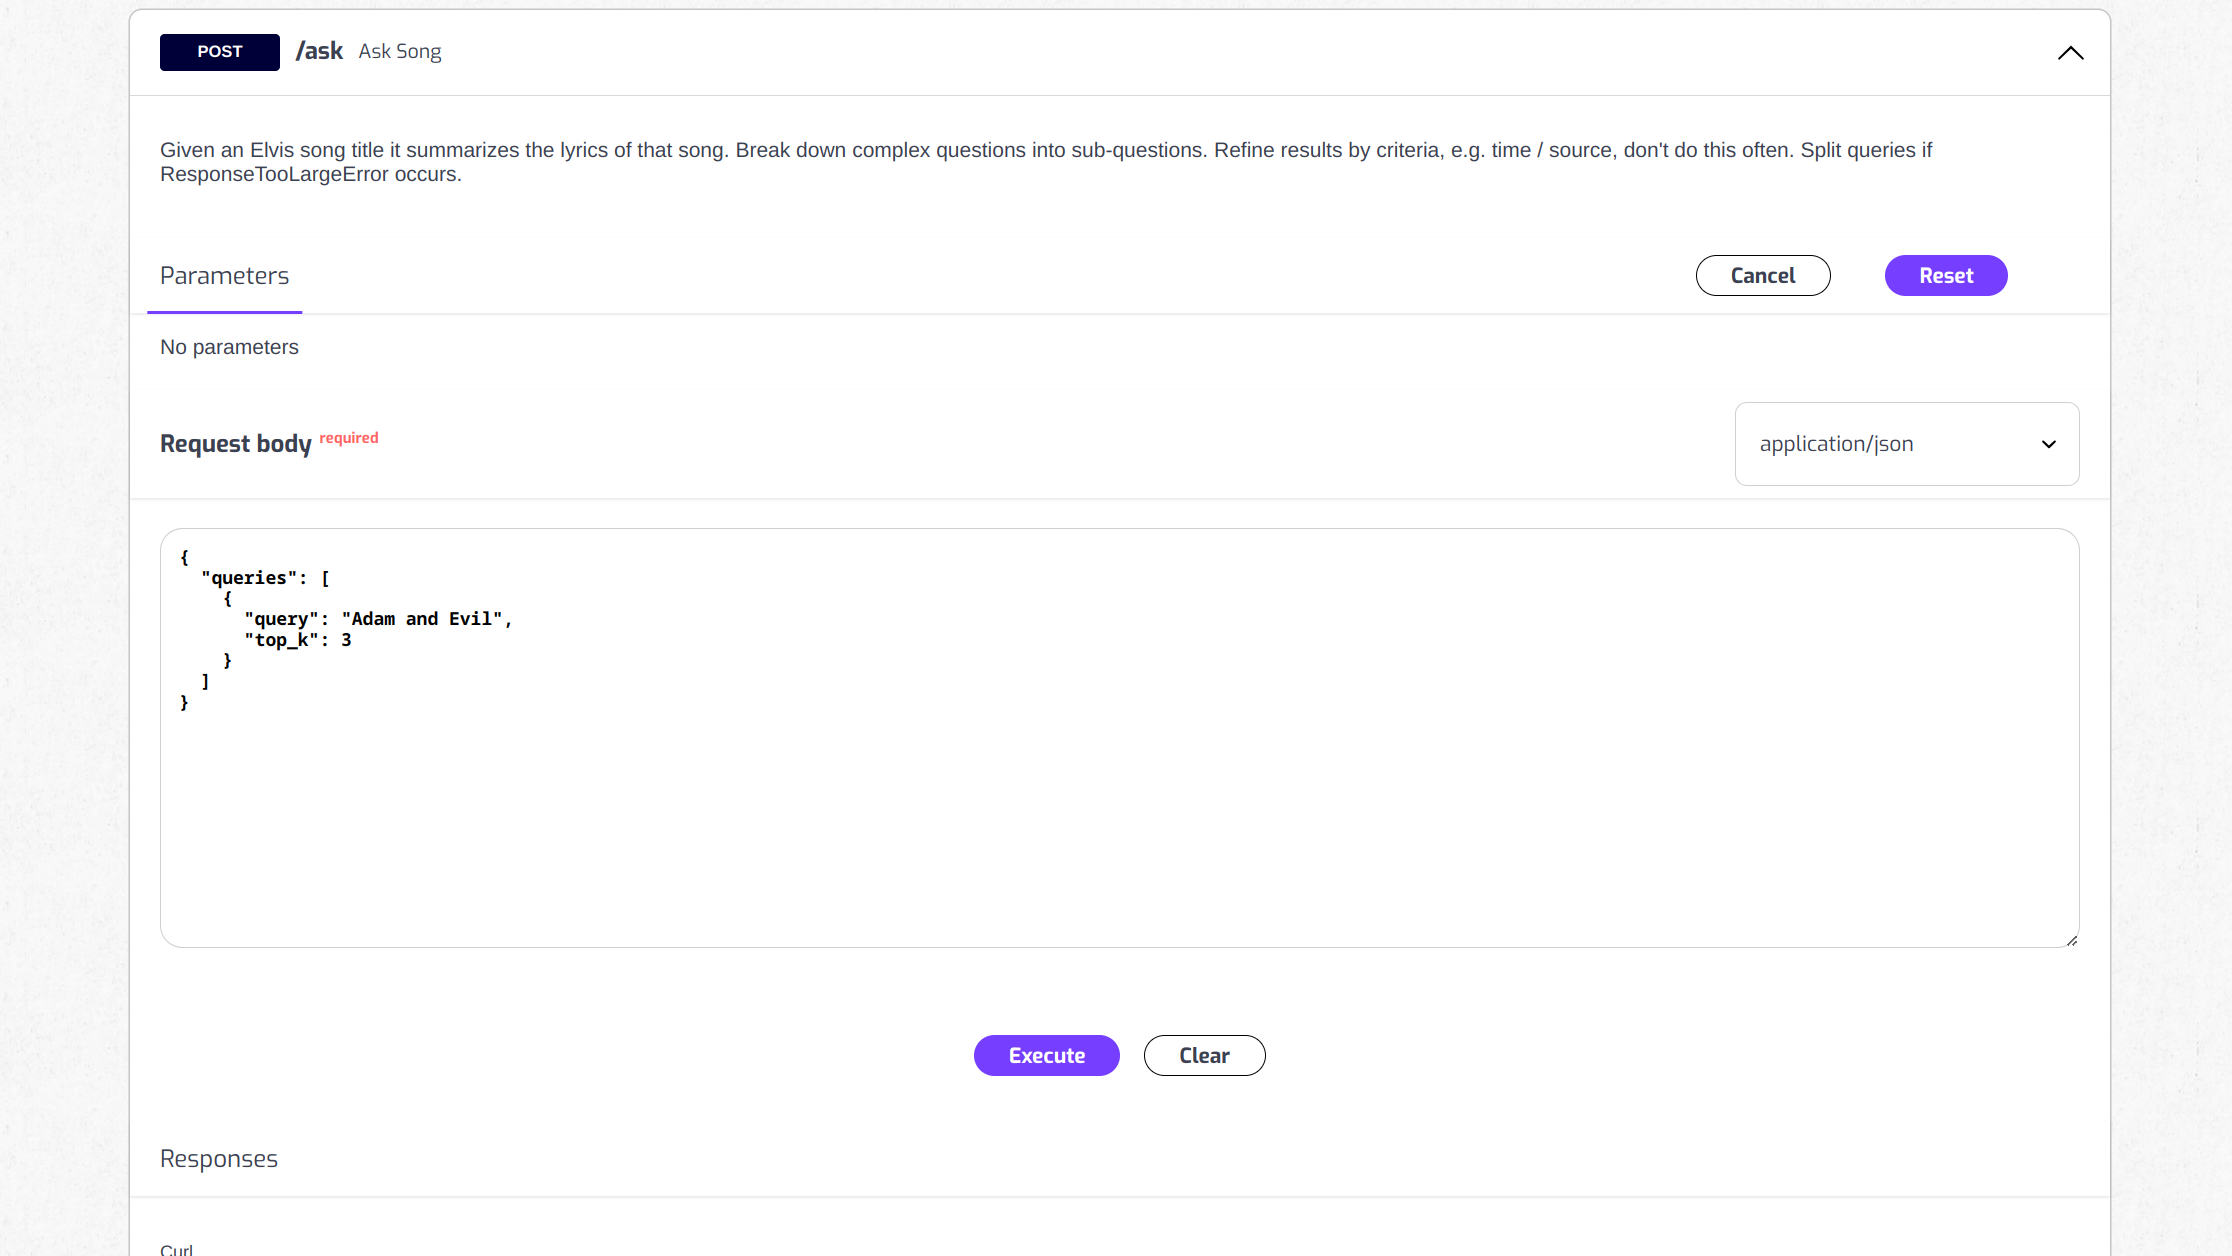
At this point the Nevermined App will send a HTTP request to the upstream service via the Proxy (including the JWT token). The Proxy will validate the user is a subscriber and if that's the case will forward the request to the upstream service and return the result.
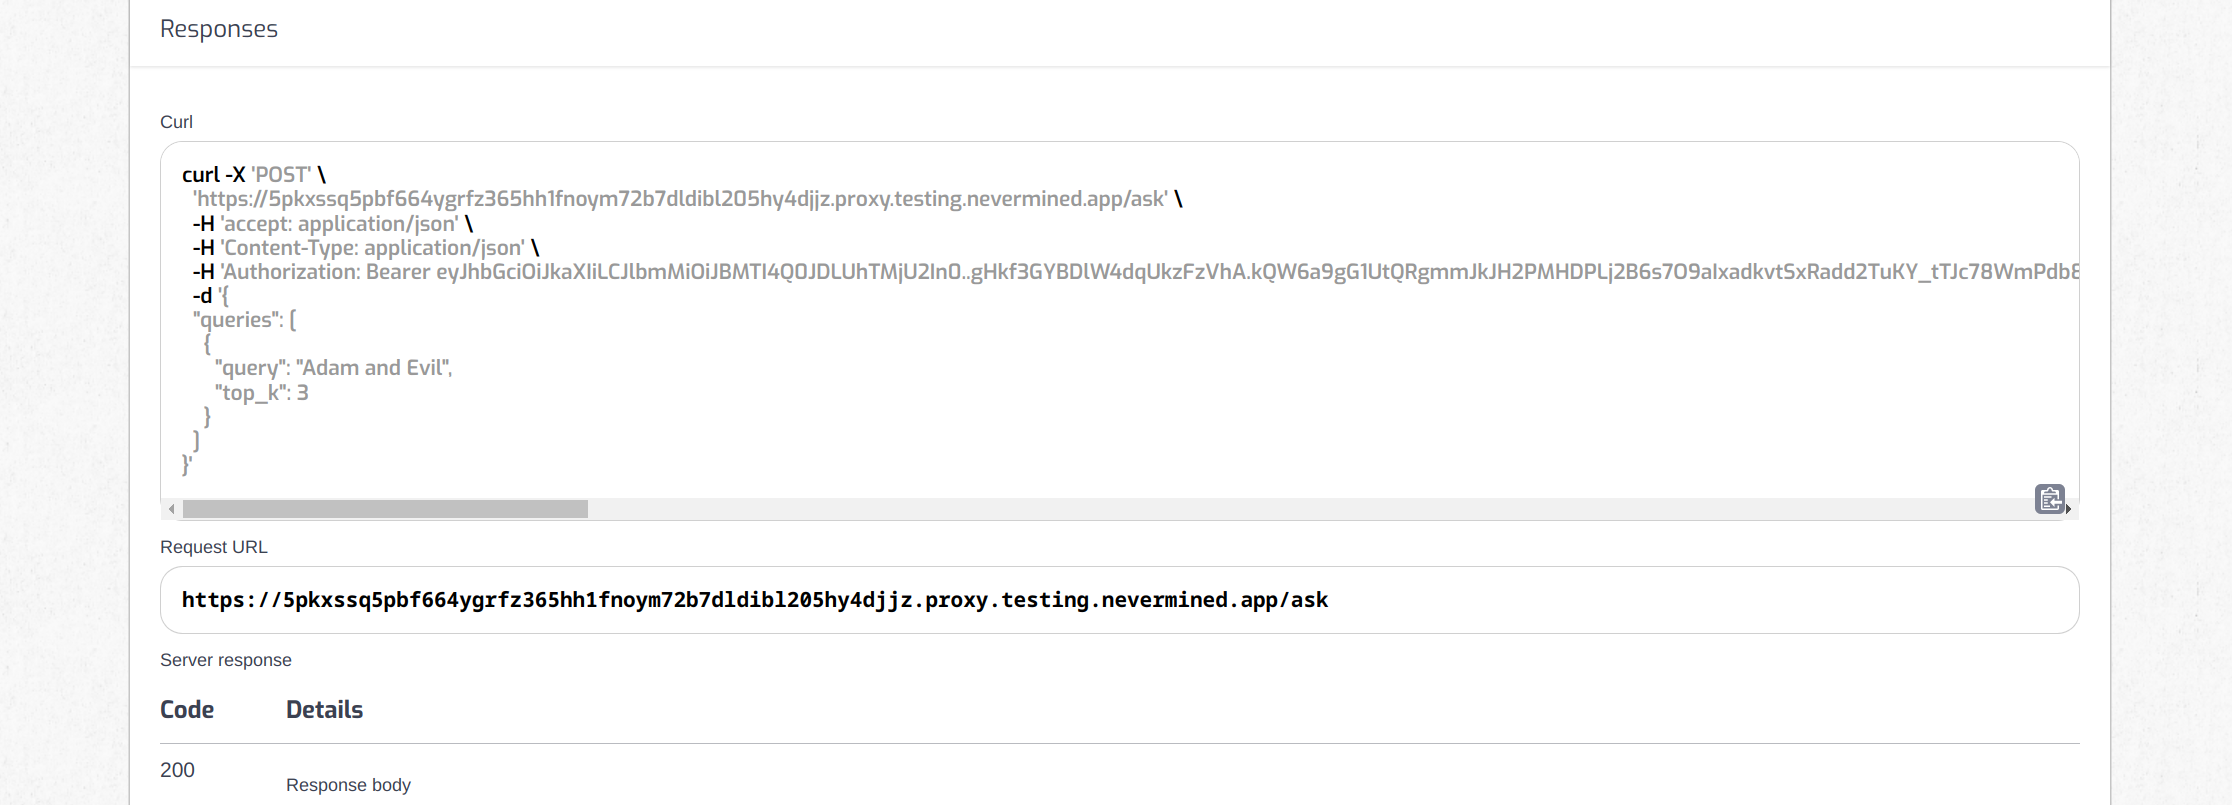
You can see a detailed view of the complete request and HTTP parameters. All this information is very valuable because shows how to make the request to the service using standard HTTP.
4. Get the JWT access token
The JWT token is the access key identifying you as a subscriber. It allows you to make HTTP requests to the AI service. Once you have it, you can make requests to all the endpoints that are included in the web service that you subscribed to.
Copy both the JWT token and the Proxy url for the network you're using (e.g. https://proxy.testing.nevermined.app/). You need these to enable your app to send HTTP requests.
If you want to know more about how everything works under the hood, please check the How everything works section of the documentation.
4. Use the JWT to call the service
Next we will show how you can integrate the web service into your app using Command Line.
4.a Using curl to integrate the web service
Here we will use curl but the same works for any HTTP client application or library.
# Here we export the JWT token pasted from the NVM App
export $JWT_TOKEN=””

# In our example we are sending a body message via HTTP POST.
# For sake of clarity, here we export the message we are gonna send to the web service
export REQUEST_DATA='{"queries": [{"query": "Adam And Evil", "filter": {}, "top_k": 1 }]}'

# With curl we make a POST request and we add the $JWT_TOKEN as Bearer token in the Authorization header
# The url where we send the request is the host name of the proxy: "https://proxy.testing.nevermined.app" plus the endpoint of the service
# we are calling, int this case "/ask"
curl -k -X POST -H "Content-Type: application/json"  -H "Authorization: Bearer $JWT_TOKEN" -d "$REQUEST_DATA" https://proxy.testing.nevermined.app/ask

{"response":"\nThe song is about a person who is in love with someone who is not perfect, but they cannot live without them. Despite knowing that loving this person will bring heartache, they are willing to take the risk and accept the consequences. The song also compares the relationship to the story of Adam and Eve, with the person in the song being like Adam and their love interest being like Eve.","source_nodes":[{"node":{"text":"...","doc_id":"8e748293-f8d2-41b8-a225-7479455b1899","embedding":null,"doc_hash":"451d68b33de1e8034e48c6a98865364e52edd02837f06c34c662ba6d6d462c76","extra_info":null,"node_info":{"start":0,"end":1030},"relationships":{"1":"did:nv:3e0a13a6dba0ab20e83bf25c3e820af8b71c94cea0ab0763b4f822a6998009e6"}},"score":0.7585169416635178}],"extra_info":null}
4.b Using typescript to integrate the web service
const proxyEndpoint = `https://proxy.testing.nevermined.app/ask`
const requestData = '{"queries": [{"query": "Adam And Evil", "filter": {}, "top_k": 1 }]}'

opts.headers = {
    // The proxy expects the `HTTP Authorization` header with the JWT
    authorization: `Bearer ${JWT_TOKEN}`,
    'content-type': 'application/json'
}

opts.method = 'POST'
opts.body = requestData

const result = await fetch(proxyEndpoint, opts)

assert.isTrue(result.ok)
assert.equal(result.status, 200)