How to expose an AI agent and publish it into Nevermined
In the following sections we will show how you can easily expose your AI model through web services endpoints. With this endpoints up & running you will be able to register this service in Nevermined so you can safely share, and monetize, your AI model
Enviroment and dependencies
The tips and code examples we will provide in this tutorial assume you have developed your AI service using Python, so you need to be acquainted to working wiht Python projects.
We recommend you to use a enviroment manager to install the dependencies, like venv, conda, etc
venv as enviroment
For example, to create a virtual env for your project you can use venv:
python -m venv .venv
source .venv/bin/activate
All the dependencies installed using pip install will be installed in the virtual enviroment and not in your OS.
To stop using the virtual enviroment you just need to use the deactivate command
deactivate
Dependencies
The dependencies needed in order to run your services are fastapi, and uvicorn.
You can install this dependencies in your enviroment using pip install or you can use a setup.py file like the one included in this repository. If you use the setup.py file, you need to execute:
pip3 install -e .
Synchronous service
The first approach to expose your AI model would be to implement a synchronous endpoint, that takes some parameters from a GET request, call your AI function, waits until the function finish the computation, and return the result.
The sync approach is valid when the execution of your AI model/service does not take long. If the service takes over a minute to complete the execution and return a response, we would strongly suggest you to take an asynchronous approach.
To implement this sync service we will use FastAPI framework. You will see how easy is to run a service wit a few lines of code.
You need to install both fastapi and uvicorn dependencies.
Implementing a GET method
In the following examples we will show you some code snippets with the relevant pieces of code to implement these service. But you can see the full example in the sync_service.py file contained in this repository.
First thing to do is to define a FastAPI app:
app = FastAPI( title="Awesome AI service",
    summary="Brief summary of your service here",
    description="Full description of your awesome AI model here",
    version="1.0.0",
)
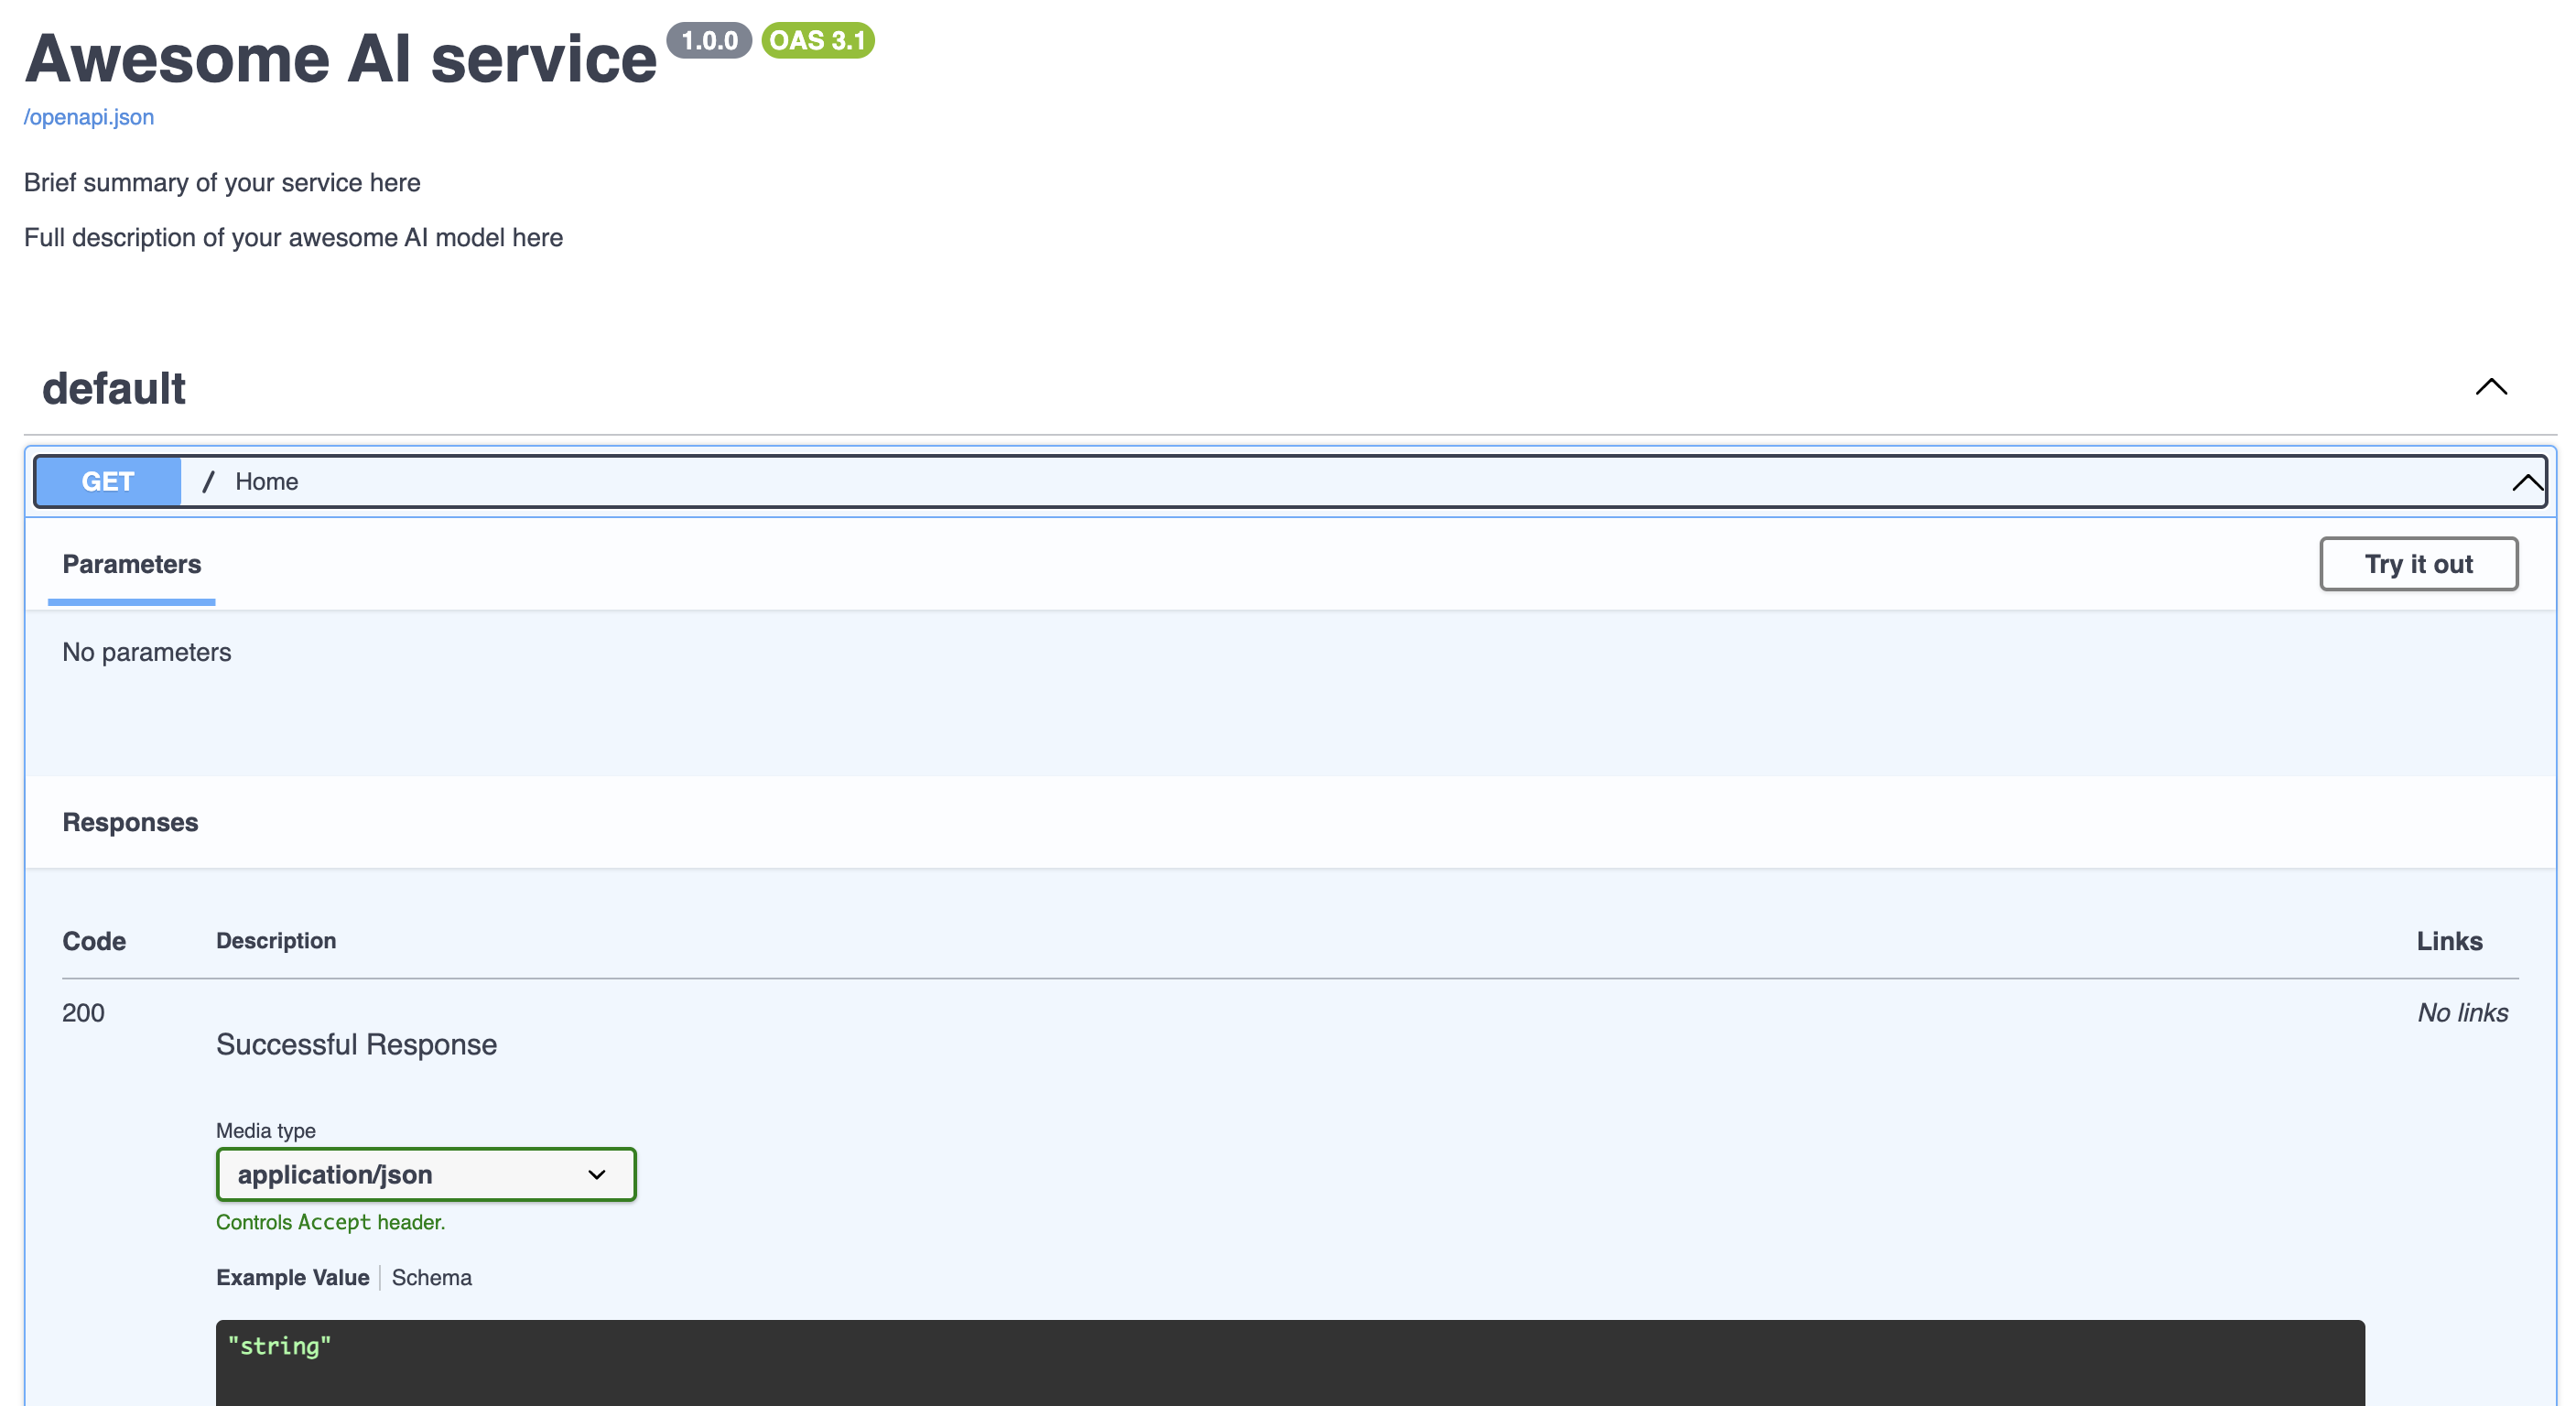
The information passed to the FastAPI object will be use to construct the docs of the service, so take your time to describe your service!
Let's implement a Hello World endpoint:
@app.get("/")
def home():
    return "Hello World!"
And that's it, you have your first endpoint implemented
To run the service just execute this command from the root folder of your project:
uvicorn service.sync_service:app --reload
If you navigate to http://localhost:8000/docs in your browser, you will see the documentation generated automatically by FastAPI.
To call the Hello World endpoint you just need to browse to http://localhost:8000/
Calling your AI model with parameters
The next step is calling your AI service, using a couple of parameteres you get from the service request:
@app.get("/ai_service")
def ai_service(param1, param2):
    logger.debug("Processing AI service with params: " + param1 + ',' + param2)

    # calling the AI function. It returns a string with the result
    result = awesome_ai_service.execute(param1, param2)

    return {"result": result}
Really simple, we just defined an ai-service endpoint, that gets two parameters, param1 and param2, you will use to call your awesome AI service. The AI service returns a string result we use to compose a json response.
If you want to try it, you just need to put this in your browser: http://localhost:8000/ai-service?param1=value1¶m2=value2
Using BackgroundTasks
Depending on the nature of your service you might need some way of executing some tasks once your endpoint returns the response. For instance, imagine that your AI function returns a path where it placed a generated pdf file, and your endpoint returns the binary content of the file.
@app.get("/ai_service_binary")
def ai_service_binary(param1, param2, background_tasks: BackgroundTasks):
    logger.debug("Processing AI service with params: " + param1 + ',' + param2)

    # calling the AI function. It returns a path where a result pdf file was generated
    result_path = awesome_ai_service.execute(param1, param2)

    with open(result_path, "rb") as file:
        bytes_stream = BytesIO(file.read())

    # close the byte stream using a background task, after its been used for the response
    background_tasks.add_task(bytes_stream.close)

    # returns the content of a pdf
    headers = {'Content-Disposition': 'inline; filename="result.pdf"'}
    return Response(bytes_stream.getvalue(), headers=headers, media_type='application/pdf')
In this example, we use the BackgroundTasks instance to close the bytes stream once we use it to compose the binary response, but you can use it to perform any kind of task you need.
Protecting your endpoints
Now you are able to implement your own endpoints to call your AI model, but until this time your endpoints are open, so anyone can use them, so let's see how you can protect your endpoints with a Bearer Token.
First you need to indicate where is your token and how to validate it. As a simple approach, you can use an enviroment variable to define the value of the token, and just compare if the request contains an Authorization Header wich value is the same
bearer_scheme = HTTPBearer()
BEARER_TOKEN = os.environ.get("BEARER_TOKEN")
assert BEARER_TOKEN is not None

def validate_token(credentials: HTTPAuthorizationCredentials = Depends(bearer_scheme)):
    if credentials.scheme != "Bearer" or credentials.credentials != BEARER_TOKEN:
        raise HTTPException(status_code=401, detail="Invalid or missing token")
    return credentials
And now we need to modify slighly the creation of the app to include this validate token function:
app = FastAPI( title="Awesome AI service",
    summary="Brief summary of your service here",
    description="Full description of your awesome AI model here",
    version="1.0.0",
    dependencies=[Depends(validate_token)]
)
And that's it, your endpoints are protected. If you try now to start the service you will see an error:
assert BEARER_TOKEN is not None
           ^^^^^^^^^^^^^^^^^^^^^^^^
You need to create the enviroment variable with the token value you want to use:
export BEARER_TOKEN=1234
Of course using 1234 as Authorization token is not the best practice here. You can use an online uuid generator tool to create a random token.
If you try now to access to the Hello World endpoint you'll get a Not Authenticated error
Try with this:
curl -H "Authorization: Bearer 1234" -X GET "localhost:8000/"
Implementing POST methods
If you need, o prefer, to implement your endpoints as POST methods instead, FastAPI makes it quite easy:
from pydantic import BaseModel

class AIRequest(BaseModel):
    param1: str
    param2: str | None = None

@app.get("/ai_service")
def ai_service(aiRequest: AIRequest):
    logger.debug("Processing AI service with params: " + aiRequest.param1 + ',' + aiRequest.param2)

    # calling the AI function. It returns a string with the result
    result = awesome_ai_service.execute(aiRequest.param1, aiRequest.param2)

    return {"result": result}
Using ngrok as tunneling solution
If you want to test how you can register your AI service on Nevermined App, you will need a way to make your service accesible outside your laptop, if you are running the service locally.
Of course the best solution here would be to deploy your service on a Cloud service like Aws, Gcloud, or on an on-premise infraestructure, etc. But to test it in a quick way you can use a tunneling tool. There are several free alternatives, but maybe the most popular is ngrok.
Creating an account and generate Authtoken
You can create a free account in ngrok website
Once you are register, you will see an option to create an Authtoken. You will need this token to run ngrok in your laptop.
Install and configure
Installing ngrok is really easy, you just need to pick the right version for your OS here and follow the instructions.
After the installation is completed, you need to add your Authtoken to the configuration:
ngrok config add-authtoken yourtokenhere
Tunneling the AI service
First you need to start the AI service with unicorn as we have already seen.
Once the service is running, you just need to execute this command:
ngrok http 8000
You will see ngrok has created a new url to forward the request to your localhost service:
Forwarding https://6557-213-94-33-247.ngrok-free.app -> http://localhost:8000
So now your AI services are accesible to anyone (as long as you keep your ngrok process running)
curl -H "Authorization: Bearer 1234" -X GET " https://6557-213-94-33-247.ngrok-free.app"
Take into account that any time you run ngrok to tunnel your local service, a new url wil be generated, so if you want to test your AI service with Nevermined App, remember to keep ngrok running until you finish all the testing.
Registering your AI Service in Nevermined App
So you have implemented some endpoints to access your AI service, you have protected them and this endpoints are available to anyone who want to use them.
You can share your service with the Community in a safety way, and even monetize them, if you want, using a Nevermined Payment Plan.
In order to test and learn how you can use Nevermined App, we provide a testing environment where you can try the different features provided by Nevermined.
You can access to this test version of Nevermined App here
Before you register your Service
We recommend you to take a look to the different guides and tutorials we have about Nevermined App
The next step is to create a brand new Payment Plan
You will register your AI Service associated with this Subscription you are about to create. The process to create a new Plan is pretty straightforward, but here you can find some help to guide you.
Registering your AI Service
So now that you have all set up and you have created a Payment Plan, you can create a Web Service Asset to register your AI Service in Nevermined App.
You can find a complete guide to register your service here
Defining Endpoints URLs
In the second step of the process you'll see you need to provide the endpoints URLs of your AI Service, and in case you have protected them with a Bearer Token, you need to facilitate it.
Instead of define the endpoints one by one manually, we can use the OpenAPI integration to do this automatically.
If you remember, when we create an endpoint with FastAPI, it generates a docs page located in https://your-ngrok-url-free.app/docs
This is not the url where are going to use. If you access to this docs page, you'll see a link named /openapi.json. If you click there in your browser you will see a json object which describe your service in OpenAPI standard. You will use the url of the page that shows this json.
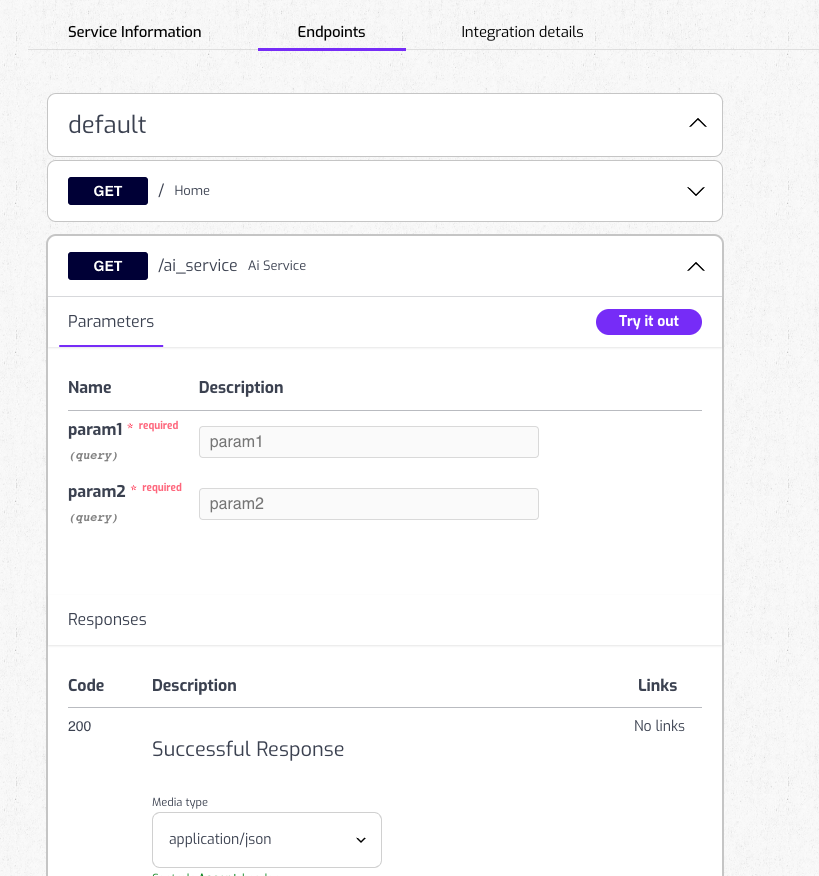
Access to the details of the Service
When the process is finished, you will be able to access the details of your new Service Asset (you can also access anytime using the "MyAssets" menu on the App). In the Service details you can access to the description of the endpoints.
Consuming your AI Service
Every user that have purchased your Plan will be able to use your AI Service through Nevermined. In this guide you can find how users can integrate your service.
Examples
Use the service through Nevermined Proxy URL is pretty straighforward, you need to use the Proxy URL instead of the actual URL of your service, adding the specific endpoint you want to call and the parameters defined in that endpoint, and indicate and the Authorization Header with the JWT.
For instance:
export NVM_TOKEN="eyJhbGciOiJkaXIiLCJlbmMiOiJBMTI4Q0JDLUhTMjU2In0..EW-BsszuYJLLuBylm6VPvw.zlGJQcCRjjG_m....srbCQpQ"
curl -H "Authorization: $NVM_TOKEN" -X GET "https://5shbhhycwqvkqxjix1ubwnfss6fec5mpptaloqgx9agsqblyrt.proxy.testing.nevermined.app/ai_service?param1=value1¶m2=value2"
In case you have implemented your endpoints as a POST method, you can call them like this:
curl -H "Authorization: $NVM_TOKEN" -X POST "https://5shbhhycwqvkqxjix1ubwnfss6fec5mpptaloqgx9agsqblyrt.proxy.testing.nevermined.app/ai_service"  \
--header 'content-type: application/json' \
--data '{"param1": "value1", "param2": "value2"} '